
Muttlib public release
Boost your data project's development speed

Posted by Luis Alberto Hernandez
on June 9, 2021 · 12 mins read
What is muttlib?
Throughout many data projects we noticed shared needs. Shared needs lead to shared (which is an euphemism for copy-pasted) code, and the natural step is to centralize all of that code into a single codebase where you can add tests, enforce best practices and distribute easily. muttlib set out to be exactly that: a library of helpers and utils that, although not core to any project, most of Mutt's projects would have at their core.
You know the drill: you have some problem, you write a nice little utils module that solves just that. A few months go by, and in a weekly someone says they're gonna solve the exact same thing you already solved in another project. So, you tell them and... what could they do, other than shamelessly copy pasting it into their own codebase? Maybe even the tests suite (if there were some and they are feeling fancy). This was a common occurrence, so, any nice little utils now go into muttlib.
Since muttlib centralizes all this code, it becomes easier to maintain: tests can be added/updated as needed, fixes and improvements go into just one place, as well as any regression that needs fixing. Most people at Mutt , if not all, have write access to the repo, so fixes usually go in quickly. This is as long as all CI checks pass and you followed everything on the Contributing guideline we wrote early on when we set ourselves to publicly release it.
The beginnings and the road to this public release
Muttlib's first commit can be tracked down to 26 Jan, 2019. Around that time, it was home to functions that had been written for different projects but were specific to none of them, and so, could be (or had already been) reused across projects.
Since then, it continued to grow non-stop into a catch-all-repo-of-nonspecific-functions. Which, at the time, was quite useful. However, it had spiraled out of control and gotten a little bit untidy.
When we set the milestone of making a public release by the end of Q4 2020, we had to evaluate, prioritize and categorize all the issues we had already opened. But, also, new ones that delineated what and how we wanted muttlib's 1.0 to be: a reference guide for other projects at Mutt Data on how we believe projects should be structured and how/what tools should be used to enforce best practices.
This included everything from pre-commit and setting up Sphinx for documentation, up to CI jobs that check that the version number has been bumped and the changelog has been modified.
We wanted to get everyone at Mutt Data involved, so usually new hires went through some issues as part of their initial onboarding.
What kind of utils will you find in Muttlib?
dbconn
This module provides connectors to multiple common databases. It supports most of the popular flavors of RDBMSs like sqlite, postgres, mysql, sqlserver, oracle, teradata as well as NoSQL such as mongo.
If you need to go BIG DATA mode dbconn also has an interface to ibis for Apache Impala (an MPP system over Hadoop), Google's bigquery, Apache hive and this is just the beginning.
Is your favorite database missing? No problem, you can submit an issue asking for it to be added as a new-feature. You already have some code or idea? Even better, you could propose it as a merge request. We love collaboration, you just need to follow our guidelines to get started.
What can you do with it?
Picture the following scenario. Lately, your business is going :rocket:. You start acquiring new customers from all over the globe and you have some questions. You decide to get some of your clients' location data to_frame from your product database using simple SQL sentences to then do some ad hoc magic analysis with pandas. You could quickly achieve this with a short snippet, such as the following:
from muttlib import dbconn

clients_db = dbconn.PgClient(
    username="ninja_business_analyst",
    database="clients",
    host="my.database.product.io",
    port="5432",
    password="5tr0ngP45SwOrd",
)

query = """
  SELECT client_id, country, city
    FROM clients_location
   WHERE main_country_language = 'SPANISH'
  """

customers_df = clients_db.to_frame(query)
customers_df.head(10)

#     client_id     country         city
# 0      296377   ARGENTINA         CABA
# 1      296382   ARGENTINA         CABA
# 2      296145   VENEZUELA BARQUISIMETO
# 3      296224   VENEZUELA      CARACAS
# 4      296230   ARGENTINA         None
# 5      296448       SPAIN    BARCELONA
# 6      296450       SPAIN     MARBELLA
# 7      296447   ARGENTINA      CORDOBA
# 8      296449   ARGENTINA      MENDOZA
# 9      296451   ARGENTINA   ENTRE RIOS

# your analysis just began ...
After doing some ninja transformations you might want to insert_from_frame to your business database, to later create some visualizations with a BI tool integration. You could do:
# ninja code above ...

business_db = dbconn.MySqlClient(
    username="ninja_business_analyst",
    database="clients",
    host="my.database.business.io",
    port="3306",
    password="5tr0ngP45SwOrd",
)

business_db.insert_from_frame(df=customers_df, table="clients_location")
After showing your dataviz to your partners you managed to find the correct values that were missing, so you can just update your business' database with a simple SQL sentence, updating it right away:
# more ninja code above ...

query = """
  UPDATE clients_location
     SET city = 'CABA'
   WHERE contry = 'ARGENTINA'
     AND city IS NULL
  """

business_db.execute(query)
I know, that was a simple scenario, but you get the point, right?
plotting
Provides an auxiliary module to help you build plots leveraging the use matplotlib. Let's try an example:
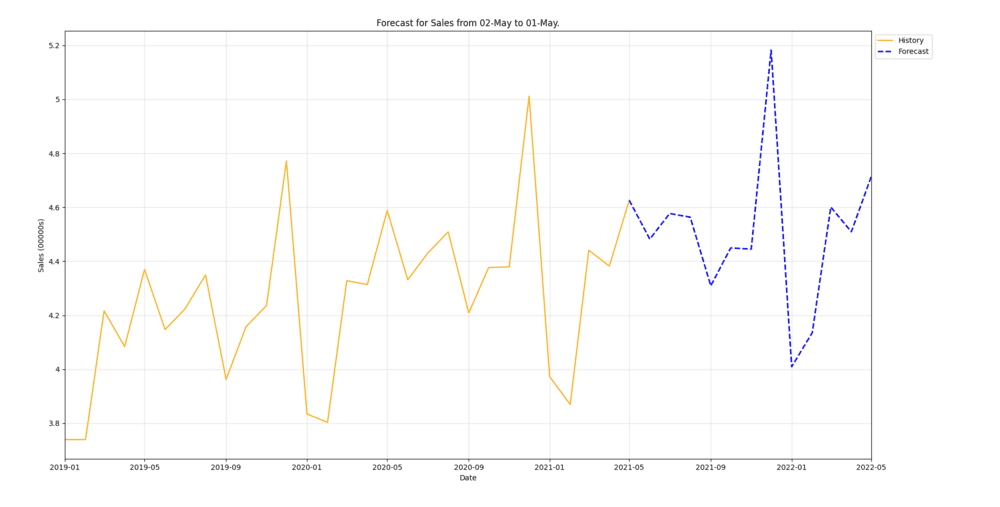
Imagine that after tuning your forecast model you want to build some visualizations of its improved performance to show in your Weekly team sync. At this point, you have sales_history and sales_forecast dataframes:
# ... some Machine Learning code above

sales_history.tail()
#            ds       y
# 23 2020-12-01  501232
# 24 2021-01-01  397252
# 25 2021-02-01  386935
# 26 2021-03-01  444110
# 27 2021-04-01  438217

sales_forecast.head()
#            ds    yhat
# 28 2021-05-01  462615
# 29 2021-06-01  448229
# 30 2021-07-01  457710
# 31 2021-08-01  456340
# 32 2021-09-01  430917
You could create_forecast_figure easily with a few lines:
from muttlib.plotting import plot, constants as const

sales_forecast = sales_forecast.rename(columns={const.Y_COL: const.YHAT_COL})
sales_forecast.head()

full_series = pd.concat([sales_forecast, sales_history])
full_series[const.DS_COL] = pd.to_datetime(full_series[const.DS_COL])
full_series.head()

end_date = pd.to_datetime(sales_forecast[const.DS_COL]).min()
forecast_window = (pd.to_datetime(sales_forecast[const.DS_COL]).max() - end_date).days

fig = plot.create_forecast_figure(
    full_series,
    "test",
    end_date,
    forecast_window,
    time_granularity=const.DAILY_TIME_GRANULARITY,
    plot_config=deepcopy(const.PLOT_CONFIG),
)
fig.show()
file_processing
This module provides convenient functions and classes for renaming files after successful operations and paralellized processing of new files. Imagine this situation:
Last night, you left some historical sales data from your core application downloading. The goal being to run some analysis as a preliminary exploration of your Machine Learning project. Today, you want to inspect and prepare those files before the magic begins. You could start that task using get_new_files this way:
from muttlib import file_processing

downloaded_file_path = f'/tmp/sales_data'

file_processing.get_new_files(downloaded_file_path)
# ['/tmp/sales_data/2021/04/sales.data',
#  '/tmp/sales_data/2021/03/sales.data',
#  '/tmp/sales_data/2021/02/sales.data',
#  '/tmp/sales_data/2021/01/sales.data',
#  '/tmp/sales_data/2020/12/sales.data',
#  '/tmp/sales_data/2020/11/sales.data',
#  '/tmp/sales_data/2020/10/sales.data',
#  '/tmp/sales_data/2020/09/sales.data',
#  '/tmp/sales_data/2020/08/sales.data',
#  '/tmp/sales_data/2020/07/sales.data']

# ... more exploration code
You notice, in your files, that the data is seperated by pipes -- and you don't like this -, because you're a fan of semi-colon-seperated files. You could easily adress this problem with process_new_files and a simple transformation function. This approach would look something like this:
# ... more exploration code

def replace_column_separator(filename, rbr):
      with input_file as open(filename, "rt"):
          data = input_file.read().replace('|', ';')
      with output_file as open(filename, "wt")
          output_file.write(data)
      return True
    except:
      return False

file_processing.process_new_files(replace_column_separator, '/tmp/sales_data')
forecast
This module gives FBProphet an interface akin to Sklearn and solves general utilities for forecasting problems. For instance, limiting the datasets to the last n days, which allows for bigger grid search spaces for hyperparameters, and is not available using standard FBProphet and Sklearn libraries.
SkPropheta Scikit learn compatible interface for FBProphet andStepsSelectorEstimatoras an estimator selector.
Both have a common interface:
fitandpredictScikit learn's like methods to the Prophet model and,get_paramsandset_paramsmethods to get and set the estimator's parameteres, respectively.
Let's have a sneak peek at how forecast could be used with the next snippet:
import pandas as pd
from muttlib.forecast import SkProphet, StepsSelectorEstimator
from sklearn.model_selection import GridSearchCV, ParameterGrid

# The grid has to be turned into a list if used in a StepsSelectorEstimator
# as it has to be copyable for get / set params
prophet_grid = list(
    ParameterGrid(
        {
            "sk_date_column": ["date"],
            "sk_yhat_only": [True],
            "sk_extra_regressors": [[], [{"name": "b"}],],
            "prophet_kwargs": [
                dict(daily_seasonality="auto"),
                dict(daily_seasonality=True),
            ],
        }
    )
)

days_selector_grid = {
    "estimator_class": [SkProphet],
    "amount_of_steps": [90, 120],
    "sort_col": ["date"],
    "estimator_kwargs": prophet_grid,
}

# To instance GridSearchCV, we need to pass an initialized estimator
# (for example, a `StepsSelectorEstimator`)
initial_estimator = StepsSelectorEstimator(
    SkProphet, days_selector_grid["amount_of_steps"][0], prophet_grid[0]
)
cv = GridSearchCV(initial_estimator, days_selector_grid, cv=2, scoring="r2")

X = pd.DataFrame({"date": [0, 2, 3, 4, 5], "b": [1, 4, 5, 0, 9]})
y = pd.Series([1, 1, 0, 1, 0])
cv.fit(X, y)
gdrive
This module provides a UNIX-ish interface to Google Drive to help you integrate to your pipelines. Most of us, if not all, are familiar enough with the terminal to understand how this module works. Instead of getting familiar with a GDrive client, you can use GDrive the same way you use your own filesystem.
If your client requires getting reports on a shared folder, you can easily create it, share it and populate it with this module! Or if you are working on a jupyter notebook and need to find out quickly where on GDrive you'd need to save the output of your analysis, you can use this as well.
from muttlib.gdrive import GDrive

GOOGLE_SERVICE_ACCOUNT_CREDS_JSON = "/some/local/dir/path/to/json/file.json"

gdrive_client = GDrive(GOOGLE_SERVICE_ACCOUNT_CREDS_JSON)
More about how to create and manage Google service account keys
You could list all files within the current folder using that well-known ls command
# ...

gdrive_client.ls()
Not sure what the current folder is? Print it with pwd
# ...

gdrive_client.pwd()
Moving to another folder? Yes, you could use cd
# ...

# Name of the new directory
folder_name = 'Data'

gdrive_client.cd(folder_name)
Now that you're familiar and want to start creating. mkdir will be useful if you need a new directory
# ...

# Name of the new folder to create
new_folder_name = 'Reports'

gdrive_client.mkdir(new_folder_name)
And then creating a new file of an specific mimetype on this folder with touch
# ...

# Name of the new file to create
new_file_name = 'Sales'

# a valid mimetype
mime_type = 'application/vnd.google-apps.spreadsheet'

gdrive_client.touch(new_file_name, mime_type)
More about MIME types.
Last but not least, chown to give or transfer permissions for a folder or file within the current directory
# ...

# Email of the transferee.
email = 'user@mycompany.ai'

# Role of the transferee:
# owner, organization, fileOrganizer, writer, commenter or reader
role = 'commenter'

# Type of permission to grant:
# user, group, domain or anyone
permission_type = 'user'

gdrive_client.chown(email, role, permission_type)
More about Permissions.
gsheetsconn
But... how to dump a dataframe to the GSheet you just created with the gdrive module? Well, the gsheetsconn module is here to the rescue, providing a pandas interface with Google Sheets.
from muttlib.gsheetsconn import GSheetsClient

google_service_account_creds_json = "/some/local/dir/path/to/json/file.json"
gsheets_client = GSheetsClient(google_service_account_creds_json)
Using insert_from_frame will help you to get the job done
# ...

gsheets_spread_id = "some-google-sheets-id"
gsheets_worksheet_name = "customer-email-contacts"
gsheets_client.insert_from_frame(
    customer_email_contacts_df,
    gsheets_spread_id,
    index=True,
    worksheet=gsheets_worksheet_name,
)
Now that you are unstoppable, working with another spreadsheet in pandas will be easier, you just need to use to_frame
# ...

gsheets_spread_id = "some-google-sheets-id"
gsheets_worksheet_name = "gsheets-worksheet-name"
return_df = gsheets_client.to_frame(GSHEETS_SPREAD_ID, worksheet=GSHEETS_WORKSHEET_NAME)
utils
This module provides a project agnostic utilitarian set of functions to help you tackle some of those monotonous and not that trivial but necessary tasks when working on a project. Let's explore some of it with a common scenario:
Your client finally sent you a dataset with more info about their customers, which you had been waiting for in order to continue with your Machine Learning project.
import pandas

df = pandas.read_csv('customers_more_info.csv')

df.head()
#   CustomerName  CustomerAge  ItemsPurchased
# 0         Juan           25              15
# 1        Pedro           43               2
# 2        Mateo           62               1
# 3        Pablo           19               5
# 4        Jesus           33              66
The first thing you notice is that column names in this new dataset use a different case than the rest of the frames you are working with. The first task on your backlog, for the sake of project consistency, is to convert all column names using convert_to_snake_case
import pandas
from muttlib import utils

df = pandas.read_csv("customers_more_info.csv")

df.columns = [utils.convert_to_snake_case(column) for column in df.columns]

df.head()
#   customer_name  customer_age  items_purchased
# 0          Juan            25               15
# 1         Pedro            43                2
# 2         Mateo            62                1
# 3         Pablo            19                5
# 4         Jesus            33               66
After a while, you have a first version of your Machine Learning model and you want to run some experiments using diferent random generated subsets to evaluate it. You also want to have control of your random seed and reproducibility capacities to gain and share vaulabe insights of your test. You could achive it using numpy_temp_seed this way:
from muttlib import utils

# Machine Learning code ...

def run_some_experiment(df, n):
    df = df.sample(n)
    # Experiment code ...
    return df


with utils.numpy_temp_seed(42):
    test_df = run_some_experiment(df, 5)

test_df.head()
#   customer_name result
# 0          Juan  0.123
# 1         Pedro  0.456
# 2         Mateo  0.789
# 3         Pablo  0.012
# 4         Jesus  0.666
Sphinx docs
One of the first goals we set to make the library more user-friendly was to build searchable, easily accesible documentation. We settled for sphinx as our tool of choice. Now people wouldn't need to dive into the code to see what capabilities it had to offer. A quick setup and CI job later, it was good to go. Of course, some tweaking was done, but it's usually quite straightforward to add sphinx docs to your project.
You can find the searchable, ordered docs at https://mutt_data.gitlab.io/muttlib/.
CI/CD and everything that makes muttlib oh so great
Throughout our journey, muttlib became a reference for several of our other projects through the build-up of a toolset that (we believe) makes development easier and less error-prone.
To start with, since it was a collaborative project, we drafted (and redrafted, and improved upon) a CONTRIBUTING.md file, aimed to explain how to help with building muttlib. This is crucial for new hirees and collaborators to get started towards meaningful contributions.
This document includes notes on the setup of the project, how to use pre-commit, the style guide we use, how to write good docstrings, how to run tests, versioning, deprecation, release, and GitLab workflow. It's a hefty read, but pays off in the long run, since everybody knows how every step of the release cycle works.
Since day one we focused on automating all menial tasks:
- Run tests
- Make sure code was correctly styled using
Black - Check if code has docstrings
- Make sure there were no security vulnerabilities introduced using
Bandit - Deploy the updated sphinx documentation
- Deploy to PyPI or gitlab registry the new version
- If it was an untagged release, just to test registries
- Make sure version was bumped!
- Ensure the changelog had been updated
All of these checks run on GitLab CI. The beauty of it is that we can reuse these battle-tested jobs in other projects seamlessly.
pre-commit deserves a little more attention here. This tool to run hooks at different stages of the git workflow is the basis of code quality for us nowadays. Sure, some of us use vim or vscode plugins that run linters, formattters, and such. But pre-commit has the final word.
As of writing this, we are running black, mypy, pylint on commit. On push, we run (through nox) tests, linters, and bandit. So, all code we push is supposed to pass all tests and be correctly formatted, but we enforce this on a fresh environment on CI.
There are a lot of tools involved. But we embrace them for several reasons. First of all, they are useful for their purpose. Second, having a standarized workflow leaves little room to clash on heavy opinions about several aspects of it. Third, they can be automated. And when you know how to work on a project, you can go give a hand in another if needed and you'll know how that works too.
GitHub mirroring
We mostly use Gitlab (there's an evergoing feud on GitHub vs Gitlab on our Slack), but many people prefer to use GitHub and they discover and star code there. Mutt Data is on GitHub, although without much activity. However, to make it easier for everyone, we mirrored muttlib from Gitlab to GitHub.
Issues on github
The main point of doing this is that if you don't have a Gitlab account, you can open issues on GitHub.
We haven't got any ongoing issues over there, but we sure are paying attention.
What's Next?
2021 isn't without it's own challenges. We look forward to improving upon the api, docs and testing as well as the coherence of our modules. Not to mention, we believe dbconn still has some maturing to do.
A big part of achieving our goal of publicly releasing Muttlib was going through everything that had made it into the library throughout the last few years. This process made us conscious about what we envisioned for Muttlib and revealed code that didn't really fit into the library or was hardly useful. You might have guessed it's fate: the best code is no code.
With this out of the way, we had it easier to push towards the direction we now envisioned more clearly: Muttlib is a library of helpers, facilitating data projects for Data Nerds.
Wrapping Up
Muttlib is the result of the joint effort of the following talented Data Nerds:
- Aldo Escobar
- Alejandro Rusi
- Cristián Antuña
- Eric Rishmuller
- Fabian Wolfmann
- Gabriel Miretti
- Javier Mermet
- Jose Castagnino
- Juan Pampliega
- Luis Alberto Hernandez
- Mateo de Monasterio
- Matías Battocchia
- Pablo Lorenzatto
- Pedro Ferrari
- Santiago Hernandez
It's been (and hopefully will continue to be) a great experience to build Muttlib together as a team. Thanks to them all.